
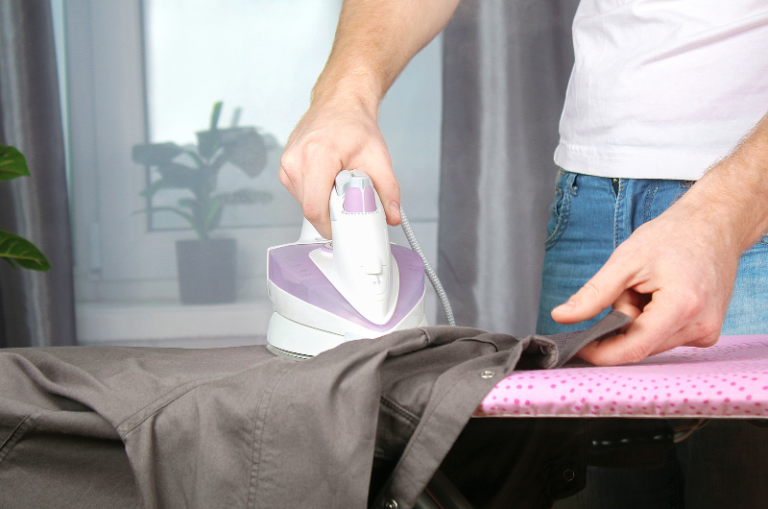
You have a client meeting at 9 am, the Northern line is running late, and the shirt hanging on your wardrobe door looks like it spent the night in a rucksack. Sound familiar? Whether you commute into the City, work from a flat in Battersea or are getting ready for a wedding in Fulham, knowing how to iron a shirt is one of those everyday skills that makes you look instantly more put-together.
The good news is that it is not difficult. It simply needs the right order of work, the right temperature and a little patience. After 35 years of pressing shirts, suits and delicate garments on Northcote Road, we have seen every ironing mistake there is: scorched collars, shiny patches, creases pressed permanently into sleeves. Most of them are easy to avoid.
In this guide we cover how to iron a shirt properly, how to iron a dress shirt, the best way to iron a shirt for different fabrics, and how to remove wrinkles from a shirt when you have no time and no ironing board. We also explain when it makes sense to hand your shirts over to professionals.
Why Learning How to Iron a Shirt Properly Matters
A well-pressed shirt does more than look smart. It signals care and attention to detail, which is why so many of our regular customers across Clapham, Wandsworth and Battersea bring us their work shirts every week. But there are practical reasons to learn how to iron a shirt properly, too.
It protects the fabric. Ironing at the wrong temperature is the most common way shirts get damaged. Too hot and cotton yellows or scorches; too cool and you push wrinkles around without removing them. Learning the basics extends the life of your shirts.
It saves money and time. If you can press a shirt in five to seven minutes, you can keep a rotation of shirts looking sharp without paying for every wash and press. Many Londoners combine both: ironing at home for everyday shirts and sending special pieces out.
It makes shirts fit and hang better. A properly pressed collar sits flat against your neck, cuffs lie neatly under a jacket sleeve and the body drapes cleanly. A badly ironed shirt looks lumpy even if it fits perfectly.
If a shirt needs more than ironing, such as a loose button, a frayed cuff or sleeves that are too long, our clothing alterations and repairs service can fix it before you press it for the last time.
Our specialists provide reliable cleaning, repairs, and alterations. contact us and book today.
What You Need Before You Start
Good results begin with good preparation. Gather these items before you plug in the iron.
The Essential Tools
- A steam iron with adjustable temperature settings and a clean soleplate
- A sturdy ironing board with a clean, smooth cover (a worn or scorched cover transfers marks to your shirt)
- A spray bottle filled with water for stubborn creases
- A sleeve board or rolled-up towel (optional) for pressing sleeves without creating fold lines
- A good hanger, ideally wooden or padded, so the shirt does not re-wrinkle the moment you finish
- A pressing cloth, such as a clean cotton tea towel, for delicate or dark fabrics
A Note on London Water
Most of London has hard water, which means limescale builds up inside steam irons. Left alone, that scale can flake out through the steam holes and leave brown spots on a white shirt. Use filtered or distilled water in your iron if you can, and descale it every month or two. Always empty the tank after use and wipe the soleplate with a damp cloth once it has cooled.
Prepare the Shirt: Check the Care Label and Fabric
Before you press anything, look at the care label inside the collar or side seam. The iron symbol tells you the maximum temperature the fabric can take:
- One dot: cool iron, up to about 110°C (synthetics such as polyester, acrylic and some silks)
- Two dots: warm iron, up to about 150°C (wool blends, polyester-cotton mixes, viscose)
- Three dots: hot iron, up to about 200°C (cotton and linen)
- Crossed-out iron: do not iron at all
If the label has worn away, start on the lowest setting on an inside seam or the shirt tail and increase the heat gradually until wrinkles release.
The second tip is to iron your shirt while it is slightly damp. Fabric relaxes when moist, so wrinkles come out in half the time. If your shirt is fully dry, mist it lightly with water or use the steam function. Take it out of the washing machine promptly, give it a firm shake and hang it to dry on a hanger to start with fewer creases.
How to Iron a Shirt Step by Step
Here is the method our pressers use. The golden rule is to work from the smallest, most detailed parts of the shirt to the largest. Starting with the collar, cuffs and sleeves means you will not crush the body of the shirt while you are working on them. Follow this how to iron a shirt step by step routine and you will be done in minutes.
How to Iron a Shirt Collar
The collar is the most visible part of the shirt, so it deserves the most attention.
- Lay the collar flat on the board with the underside facing up.
- Press from the outer points towards the centre. Working this way stops the fabric bunching into the middle.
- Flip the collar and repeat on the top side, again from the tips inwards.
- Fold the collar down along its natural crease and give the fold one gentle press. Do not press hard, as you want a soft roll rather than a sharp line.
If you wear a tie, pay special attention to the back of the collar where the knot sits. A collar that is pressed flat and dry holds its shape all day. If your shirt has stiff collar stays, remove them first so they do not melt or leave impressions.
The Cuffs
Unbutton the cuffs and lay them flat, inside facing up. Press the inside first, then flip and press the outside. If the shirt has French cuffs, press them open and fold them afterwards. Slide the iron tip close to the buttons, never over them, to avoid cracking or melting the plastic.
How to Iron Shirt Sleeves
Learning how to iron shirt sleeves without leaving a hard crease down the arm is where many people go wrong. Here is a simple approach.
- Lay the sleeve flat on the board, lining up the underarm seam with the edge of the board.
- Smooth the fabric from the cuff upwards with your free hand to keep it taut.
- Press from the cuff to the shoulder, then flip it over and repeat on the other side.
- If you prefer a crisp pleat on a formal shirt, line up the seams and press the fold. If you want a softer, modern look, slide a rolled towel inside the sleeve and press around it instead.
When you are learning how to iron shirt sleeves for the first time, work slowly. Pressing too fast is how double creases appear on the upper arm. A small sleeve board makes this job much easier, but a rolled towel works nearly as well.
The Yoke and Shoulders
The yoke is the panel across the shoulders at the back of the shirt. Drape one shoulder over the narrow end of the board so the yoke sits flat, and press from the collar edge out to the shoulder point. Turn the shirt and repeat on the other side. Skipping this step is why many shirts look slightly rumpled around the neckline even though everything else is flat.
The Body: Front and Back
Now for the largest areas.
- Start with the front panel with the buttonholes. Slide the iron smoothly from top to bottom, keeping the fabric stretched with your free hand.
- Press around the buttons rather than over them. Use the nose of the iron between buttons, and press the back of the placket (the strip where the buttons sit) to avoid flattening them into the fabric.
- Move to the other front panel, then the back. Work from the shoulders down towards the hem.
- Finally, press the side seams and the shirt tails, curving the iron gently around the hemline.
Hang the shirt on a hanger straight away and button at least the top and middle buttons. Let it cool for a few minutes before putting it on or storing it. Warm fabric re-wrinkles easily, so this pause is what keeps your hard work crisp.
How to Iron a Dress Shirt for Work and Formal Occasions
Learning how to iron a dress shirt is slightly different from pressing a casual shirt because the standard is higher. A dress shirt, particularly in fine cotton or a poplin weave, shows every crease and every sheen mark. These tips make the difference.
- Use the right heat. Fine two-ply cotton can handle a hot iron, but a cotton-blend dress shirt prefers a warm setting.
- Use steam generously. Steam relaxes the tightly woven fibres of a business shirt much more effectively than pressure alone.
- Press, do not drag. On a dress shirt, lift and set the iron down rather than sliding it back and forth across the same patch. This prevents stretching and shiny areas.
- Take care with dark colours. Navy and black dress shirts show iron shine easily. Press them inside out or use a pressing cloth.
- Press pleats and darts carefully. Many tailored shirts have back darts. Follow the stitching line and press from the inside to preserve the shape.
For a wedding, an interview or an important event, you may prefer a professional press instead. Our dry cleaning service in Clapham offers same-day turnaround, so you can drop a shirt off before 10am and collect it by 5pm at no extra charge. If you are also getting a jacket ready, take a look at our suit alterations for a perfect fit.
How to Iron a Shirt Without Wrinkles
It is frustrating to finish ironing and find new creases have appeared. If you want to know how to iron a shirt without wrinkles forming as you go, these habits help.
Keep the fabric taut. Hold the section you are about to press with your free hand and pull gently. Wrinkles form when the cloth is bunched up under the soleplate.
Do not iron over folds. Smooth the shirt completely before each pass. If you press over a fold, you set it permanently.
Rotate the shirt, not your wrists. Move the shirt around the board rather than reaching and twisting. This keeps the pressed areas away from your arm and the iron cord.
Hang as you go. If you are ironing several shirts, hang each one immediately rather than stacking them on a chair. A heap of warm shirts will crease within minutes.
Mind the surface. A rumpled ironing board cover will print its own wrinkles onto your shirt. Replace worn covers or add a layer of thin padding.
Keeping these in mind, learning how to iron a shirt without wrinkles becomes less about speed and more about technique. A slow, controlled press almost always beats a rushed one.
How to Remove Wrinkles from a Shirt Without an Iron
Sometimes you simply cannot get to an ironing board: you are in a hotel, a student flat or a hurry. Here are reliable ways to remove wrinkles from a shirt without a traditional iron.
- The shower method. Hang the shirt on the back of the bathroom door while you shower. The steam relaxes light creases. Smooth it with your hands and let it dry fully before wearing.
- A handheld steamer. This is the quickest option. Hold the steamer a couple of centimetres from the fabric and work from top to bottom while tugging gently on the hem.
- A damp towel and tumble dryer. Toss the shirt in the dryer with a damp towel for about ten minutes, then hang it immediately.
- A spritz and smooth. Mist the shirt lightly with water, pull the fabric flat and hang it up. Light wrinkles will fall out as it dries.
- A hairdryer. In a pinch, dampen the crease slightly and use a hairdryer on medium heat while smoothing with your hand.
These tricks are useful for quick fixes, but they do not give the crisp, sharp finish of a proper press. If you need a sharp finish for an important event, the best way to remove wrinkles from a shirt remains a professional press.
The Best Way to Iron a Shirt by Fabric Type
The best way to iron a shirt depends on what it is made of. Use this as a quick reference.
- Cotton: The easiest fabric to press. Use a hot iron and plenty of steam, ideally while the shirt is slightly damp.
- Linen: Needs the hottest setting and lots of steam. Iron while damp and accept that a little natural creasing is part of linen’s character.
- Polyester and synthetic blends: Use a low to medium setting and press quickly. Excess heat can leave shiny patches or even melt the fabric.
- Silk: Use a cool iron, no steam, and a pressing cloth on the reverse. Water can leave marks on silk, so we usually recommend professional cleaning for silk shirts.
- Viscose and rayon: Use a low heat and press on the reverse. These fabrics are delicate when wet, so avoid heavy steam.
- Non-iron or easy-care cotton: These need only a light touch. Over-pressing can break down the finish.
A useful trick for any fabric is to test the iron on a hidden spot, such as the inside of the hem, before you start on the visible areas. For delicate pieces, it is often wiser to leave them with specialists.
Common Mistakes When Ironing a Shirt
Even confident ironers slip up sometimes. Watch out for these.
- Starting with the body. Do the collar, cuffs and sleeves first, otherwise you will crush the pressed front while you reposition the shirt.
- Ironing over stains. Heat sets stains permanently. If you spot a mark, treat it or have it cleaned before pressing.
- Using a dirty soleplate. Starch residue and limescale transfer to fabric. Clean your iron regularly.
- Setting the temperature too high. Always match the heat to the care label.
- Leaving the iron still. Keep it moving, particularly on synthetic fabrics.
- Putting the shirt straight back in the wardrobe. Let it cool and dry on a hanger first.
- Overfilling the water tank. This causes spitting and drips.
If you have a shirt that has suffered scorching or a permanent shine, bring it in and we will assess whether it can be improved.
How to Look After Your Shirts Between Washes
Prevention is easier than cure. A few habits mean you will iron less and your shirts will last longer.
- Wash at the right temperature. Follow the care label, and avoid overloading the machine, which causes deep creases.
- Use a gentler spin cycle. A lower spin speed leaves fewer wrinkles.
- Hang shirts to dry on proper hangers. Button the top button and smooth the placket before they dry.
- Store them with room to breathe. Cramped wardrobes crush fabric. This matters in smaller London flats where space is tight, so consider a slim rail for your work shirts.
- Rotate your shirts. Wearing the same shirt twice in a row without airing it out stresses the fibres and leaves more creases.
If you are looking after other items at home as well, such as curtains and soft furnishings, take a look at our home furnishing service too.
When to Leave Shirt Care to the Professionals
Ironing at home is a great skill, but there are times when it is smarter to have the experts take over.
- You are short on time. A week of shirts can take over an hour to press. Hand them over and take back your evening.
- The fabric is delicate. Silk, fine Egyptian cotton, embellished shirts and vintage pieces benefit from specialist handling.
- The shirt has stains. Stains need treatment before pressing, or they set permanently.
- You need a razor-sharp finish. Professional pressing equipment applies steam and pressure more evenly than any home iron.
- The shirt needs mending. Loose buttons, worn collars and frayed cuffs are best fixed before they are laundered.
At Elegance Dry Cleaners we have been serving homes and businesses across Clapham and South London for 35 years. Our same-day service lets you drop off before 10am and collect by 5pm, Monday to Friday, with free collection and delivery across Clapham, Wandsworth, Battersea and Fulham. You can browse everything we offer on our services page, or check our areas we cover to see whether we are near you. Customers in Fulham, Battersea and Wandsworth use us every week.
Not sure which service your shirts need? Ask for a free quote and we will give you an exact price before any work begins.
Frequently Asked Questions
Can I learn how to iron a shirt in five minutes?
Yes, with practice. An experienced person can iron a standard cotton shirt in around five to seven minutes by following the correct order: collar, cuffs, sleeves, yoke, and body. Beginners may need around fifteen minutes at first, which is perfectly normal.
What is the best way to iron a shirt quickly?
Use a steam iron on the appropriate heat setting and work with a slightly damp shirt. Follow a consistent order, starting with the collar and finishing with the body. Avoid repeatedly ironing the same area, as a few controlled passes are usually sufficient.
Should I iron a shirt inside out?
Most shirts can be ironed on the outside. However, dark or delicate fabrics should be turned inside out or protected with a pressing cloth to prevent shine or damage. Printed and embroidered areas should be ironed from the reverse whenever possible.
How do I iron a shirt properly if it has a stain?
Avoid ironing a stained shirt because heat can set certain stains permanently. Treat the stain according to the fabric’s care instructions and wash the shirt before ironing. For stubborn stains, consider using a professional cleaning service.
How do I stop my shirt collar curling up?
Iron both sides of the collar, working from the tips towards the centre. Allow the collar to cool flat before wearing the shirt. If your shirt has removable collar stays, check that they are correctly positioned and replace any that are worn or damaged.
Is it better to iron a shirt wet or dry?
A slightly damp shirt is generally easier to iron than a completely dry one. If the shirt is dry, use the steam function or lightly mist the fabric with water, provided the care label allows it. Avoid ironing delicate fabrics at excessively high temperatures.
Final Thoughts
Once you know how to iron a shirt in the right order, with the right heat and a little patience, it becomes a quick routine rather than a weekend chore. Start with the collar, move through the cuffs and sleeves, press the yoke and finish with the body, then hang the shirt straight away. Pay attention to the fabric and you will protect your wardrobe as well as your appearance.
And when time is tight, the fabric is delicate or the occasion is important, we are here to help. Pop into Elegance Dry Cleaners at 180 Northcote Road, London SW11 6RE, call us on 020 7738 2266, or contact us online, and we will have your shirts pressed to perfection. You can also read more practical garment-care advice on our blog.